Artificial intelligence no longer just responds, it also makes decisions. With frameworks like LangGraph and platforms like watsonx.ai , you can build agents that reason and act autonomously 🤯.
In this article, we will explain how to implement a ReAct (Reasoning + Action) agent locally and deploy it on IBM Cloud, all this with a practical example that includes a weather query tool 🌤️.
We need:
Have you got everything? Well, first things first, clone the repository that we will use as an example. It is based on the official IBM examples.
git clone https://github.com/thomassuedbroecker/watsonx-agent-langgraph-deployment-example.git
cd ./agents/langgraph-arxiv-research
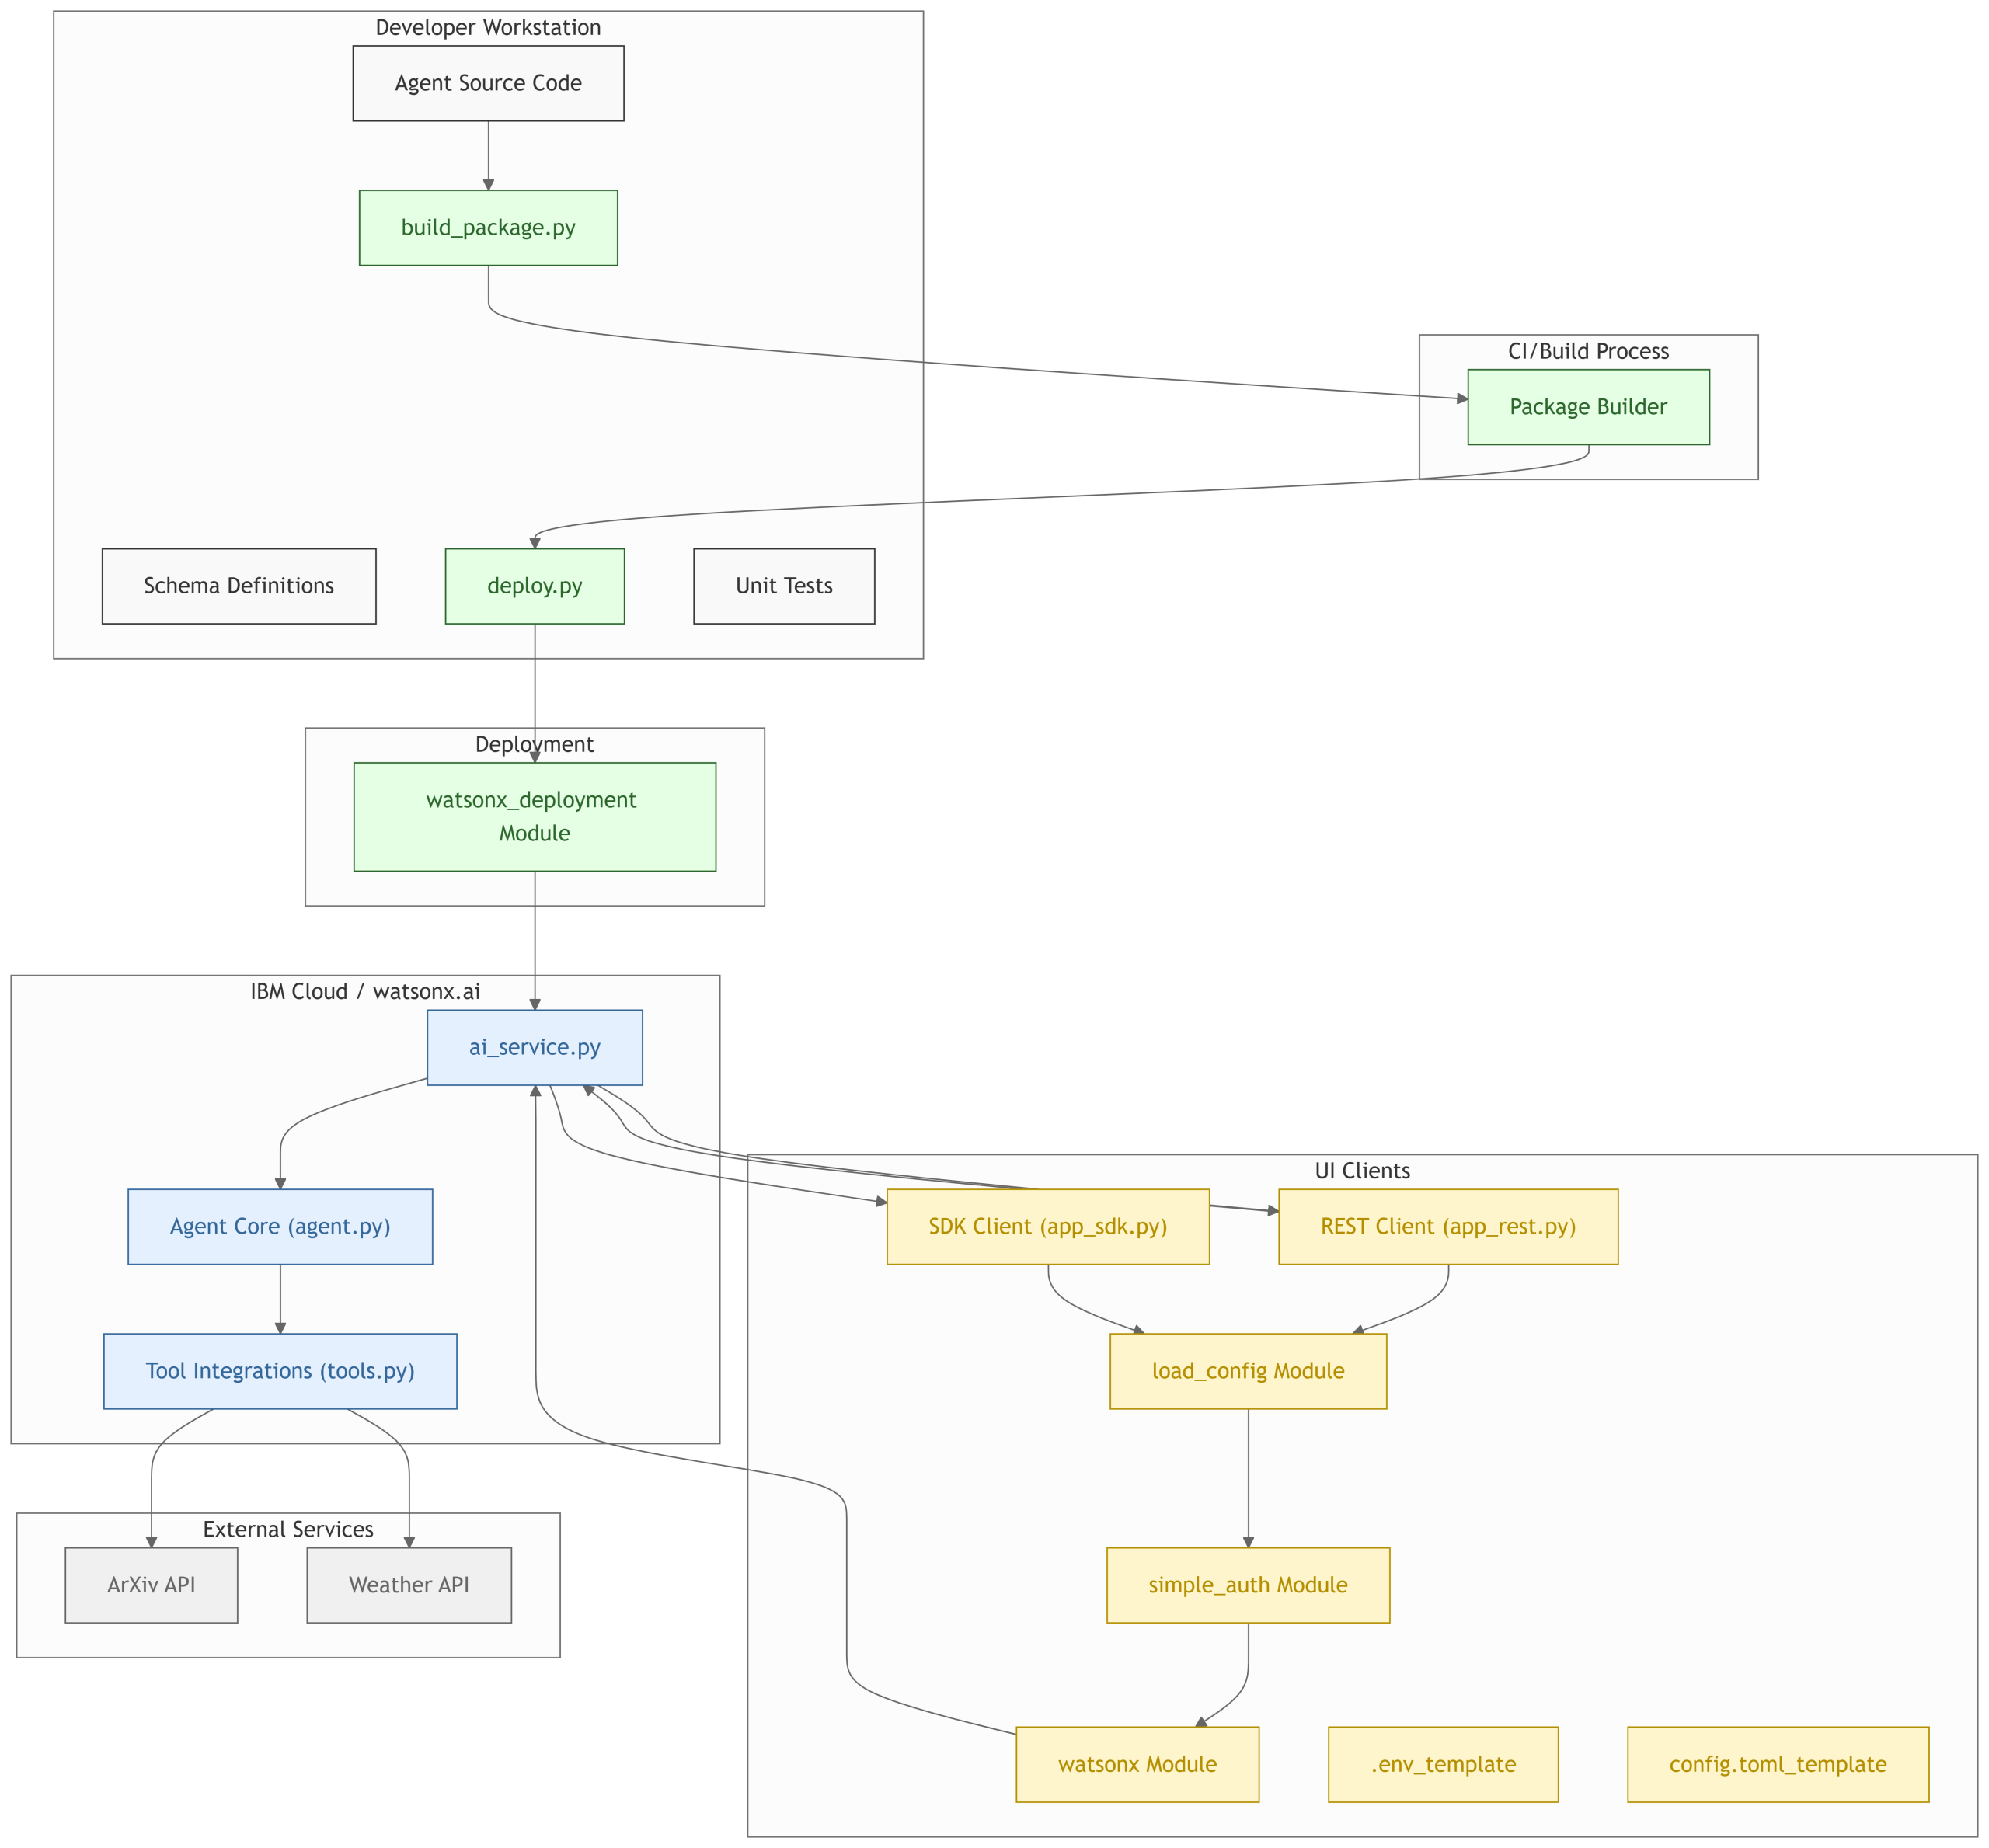
First of all, let’s understand the example project.
[Developer Workstation] → [CI/Build Process] → [Deployment] ↓The main files of the agent are:
ai_service.py | Main file that starts the agent service in production. |
agent.py | Core logic of the AI agent based on LangGraph. Defines the workflow. |
tools.py | Tools connected to the agent (Weather API). |
python3.12 -m venv .venvsource ./.venv/bin/activatepython3 -m pip install --upgrade pippython3 -m pip install poetryWe also recommend the use of Anaconda or miniconda. It allows us to manage virtual environments or Python packages in a simple way and is widely used in ML.
In order for Python to find our custom modules (such as agents and tools), we need to include the current directory in the environment variable PYTHONPATH
export PYTHONPATH=$(pwd):${PYTHONPATH}
echo ${PYTHONPATH}
Once we have the environment ready, it is time for the variables. You must create a config.toml file if you don’t already have one and use your IBM Cloud credentials:
[deployment] watsonx_apikey = "TU_APIKEY" space_id = "SPACE_ID" deployment_id = "YOUR_DEPLOYMENT_ID"[deployment.custom] model_id = "mistralai/mistral-large" # underlying model of WatsonxChat thread_id = "thread-1" # Más información: https://langchain-ai.github.io/langgraph/how-tos/persistence/ sw_runtime_spec = "runtime-24.1-py3.11"You will find your variables here:
https://dataplatform.cloud.ibm.com/developer-access
Once there, select your deployment space and copy the necessary data (API Key, Space ID, etc.).
It is time to test the agent:
source ./.venv/bin/activatepoetry run python examples/execute_ai_service_locally.pySince it’s a weather agent why don’t you try it with something like something like…?
“What is the current weather in Madrid?”
The console should give you the time in Madrid. Congratulations! we only need to do the deploy in watsonx.ai
source ./.venv/bin/activatepoetry run python scripts/deploy.pyconfig.toml) with your credentials and deployment space.runtime-24.1-py3.11).deployment_id , needed to interact with the agent later.✅ In short:
takes your local agent, prepares it and turns it into a cloud-accessible service.
{
 "messages": [
 {
 "content": "What is the weather in Malaga?",
 "data": {
 "endog": [
 0
 ],
 "exog": [
 0
 ] },
 "role": "User"
 }
] }source ./.venv/bin/activate poetry run python examples/query_existing_deployment.py
If you have any doubts, we recommend the following video tutorial where you can follow step by step the development connected with watsonx.ai
If you want to continue exploring these types of implementations or learn more about cloud development and artificial intelligence, we invite you to explore our AI courses.👇
"We haven't touched our AWS infrastructure in three months out of fear of breaking something."…
The new European Right to Repair Directive is putting an end to one of the…
Ceph is a powerful and flexible solution for distributed storage, but like any complex tool,…
🆕 IBM Power11 is here The wait is over: today IBM Power11 is officially presented,…
Can you imagine what it would be like to have a powerful infrastructure without paying…
When it comes to IBM Power servers, many decisions seem like a battle between two…